bring life to your images || Photoshop tutorial
In this tutorial, we will use Adobe Photoshop to bring life to your images and make them looks professional.
Tutorial Image
The following image was used during the production of this tutorial:
1. Edit the Image
Step 1
Go to File >Open and choose the image to open it in the Photoshop.
Step 2
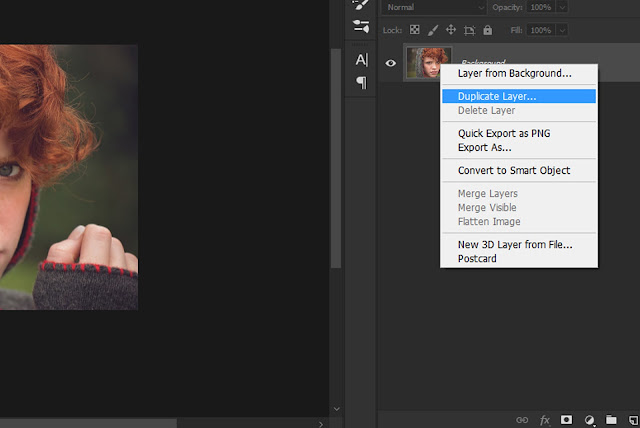
Right-Click on the layer and then click duplicate layer...
Step 3
Go to Filter >liquify... .
Step 4
use the forward warp tool to edit the face similar to the billow, use the pucker tool to make the nose smaller and the bloat tool to make the lips little filer(don't overdo it because we are trying to fix the image ).
Step 6
press on shift+F5 and make the contents to 50%gray and the blinding mode
to overlay.
Step 7
use the burn tool(exposure 15%) and dodge tool(exposure 10%) to make the dark area darker and the light area lighter similar to the image below.
Step 8
create a new layer by pressing ctrl+shift+n choose the soft brush(B) tool draw on the lips with #b83b4d color and change the blinding mood to soft light and 49% opacity.
Step 9
create new layer by pressing ctrl+shift+n choose the soft brush(B) tool draw on the eyes with #2b4626 color and change the blinding mood to softlight 70% opacity .
and you will get this result.
step 1
choose selective color from adjustment panel to show the adjustment panel go to window> adjustments.
change the setting to something similar to the setting below.
Note: every image is different so the setting will change for every image.
step 2:
choose Brightness/Contrast from adjustment panel
change the setting to something similar to the setting below.


No comments