How to Create a Double Exposure using Photoshop
There are many methods to make Double exposure effect using Adobe Photoshop. I will show you in this tutorial how to do it simply step by step.
if you want to get this effect fast you can get this action.

Tutorial Image
The following image was used during the production of this tutorial:
1. prepare your image
Step 1
Create a 1000 x 634 px document in Photoshop at 300 dpi


Step 2
fill the background with (#e7e7e7) color by clicking alt+backspace.

Step 3
drag the rose1 file into photoshop and go to select > color range.

Step 4
click in the black color around the rose change the fuzziness to 86.

press OK then the selection will be showing.
Step 5
now create a layer mask go to layer >layer mask>hide selection

Step 5

Step 6
duplicate the rose layer 4 times by pressing ctrl+j.
Step 7
click on the layer rose copy1 and press ctrl+t to transfer the rose
, move it around and rotate the layer.

Step 8
repeat step 7 to end up with the image below.

Step 9
drag the rose2 file into photoshop choose the quick selection tool(W) select the yellow flower.

Step 9
create a layer mask go to layer >layer mask>reveal selection.

Step 10
duplicate the yellow flower layer by pressing ctrl+j and repeat step 7 to get the image below.

Step 11
drag the rose2 file into photoshop choose the quick selection tool(W) select the red flower and repeat the same previous steps to end up the image below.

Step 12
group the roses layer together by selecting the layers and pressing ctrl then press ctrl+g to group the layer together.

Step 13
duplicate the roses group by pressing ctrl+j now merge the group together by pressing ctrl+e change the blending mode to hard light and change the opacity to 43%.

and now hide this layer.
Step 14
change the fuzziness to 86
press OK then the selection will be showing. now create a layer mask go to layer >layer mask>hide selection.


Step 15
create a clipping mask between group 1 and the man layer by right click on the man layer and click on create clipping mask.

Step 16
show the layer which contains the roses together that above the man layer.

Step 17
select the roses group1 and the man layer and the roses 1 copy
by hold ctrl and click on the layer now press ctrl+G to group them together.

Step 18
create a mask for the group 3 that we created by clicking on the mask icon.

Step 19
use the soft brush tool(B) with 89px and black color to clean around the man and the flowers.

2. Add effect your image
Step 1
create a curve layer go to the adjustment panel (to show the adjustment panel go to window>adjustment)click on the curve
change the curve setting to the setting below.

Step 2
create a Gradient layer go to the adjustment panel click on the Gradient Map
change the color to #290a59 and #defcfe.

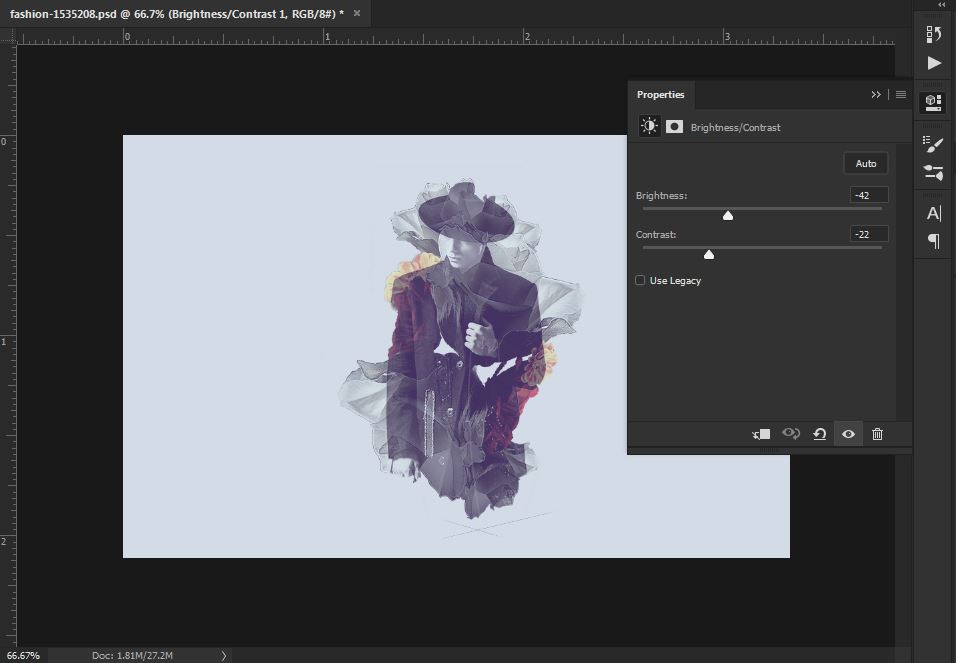
Step 3
create a Gradient layer go to the adjustment panel click on the Brightness/Contrast
change the Brightness to -42 and the Contrast to -22.
video tutorial
Awesome Work, You're Now Done!


No comments